Showing posts with label How Sweet. Babies.. Show all posts

Wednesday, July 20, 2016

Raisa's Quilt

The proximate cause of my current flurry of quilting activity was two babies that arrived this spring.  New babies are of course in need of bedding, like the flowers need sunshine.

What I discovered when I waded into the workshop was that I had already finished and given away seven of the eight so-called "Quick Children's Quilts."  I improved and finished the eighth one for one of the Spring 2016 babies; I talked about that project last month.

That obviously left me with another baby to get swaddled!  Rather than start from scratch, I decided to take some outtake blocks from a full-size quilt that was (and is) still under construction, with the working name "Somewhat Crazy Quilt."  As the title suggests, this quilt will be like an old-fashioned "Crazy Quilt" in that it is made from piecing together irregular scraps of fabric.  It differs from the classic crazy quilts in that there is no fancy top-stitching involved -- I don't do fancy top-stitching -- and in that the craziness is constrained by regular square blocks, set off within a near-white lattice.  (I wrote about making the blocks for the Somewhat Crazy Quilt on the other blog in November 2014).

So, I put together 12 leftover blocks from that project, and came up with this:


I pieced together some scrap flannel for the back and a few scraps of commercial batting for the insides, then gave it a bit of free-form quilting and a quick machine binding.  Boom!

Now, the girl who got this quilt is little sister to the girl who got the "Four Dragons" quilt a few years ago.  I'm told that when the new quilt got home, big sister immediately claimed it for herself, without necessarily relinquishing title to the older quilt.  Well, that's their business to work out between themselves.  I just like knowing that they're getting used.

The Specs

Title: Raisa's Quilt 

Serial Number: 77

Dimensions: 52" x 40"
Batting: Pieced commercial batting.
Backing: Pieced scrap flannel.  
Quilting: Loose, squiggly machine-quilted grid.

Begun: May 2016 (from existing blocks).
Finished: May 22, 2016.

Intended Use/Display: Child's blanket.

Provenance: In use as intended.

Tuesday, June 14, 2016

Eight Quick Childrens' Quilts, Part VI

A few months ago, I found myself with two new Babies of Note entering the world, and figured it was time to get cracking on the ol' quilting front.  When I took stock of the works-in-progress department, which was in considerable disarray, I eventually determined that I had one baby quilt face left from the "Eight Quick Children's Quilts" series.  It was the one I'd called #8, but that's not why it was the last one.  It was the last one because it was the boring one.


Well, obviously you can't give a baby a boring quilt.  It might screw up their development!  So, after mulling over the situation for a bit, I decided to add some warmth and visual interest by intercutting it with some bright orange stripes.  "Bright orange stripes," with the orange contained in a thin dark outline and the stripes overlapping each other in a weaving pattern, was an idea I used to tolerable effect to liven up another lackluster pattern, in 2014's "Jennifer Challenge Quilt II."

Did it do the trick this time?  You make the call!


The parents like it, that's the important thing.  It's possible that the baby herself will weigh in eventually, but it's still a little early for that.  (If you just can't wait to see a toddler be adorable about a quilt, though, I encourage you to revisit the video in last Friday's post.)

The Specs

Pompous Title: 8 Small Scrap Quilts for Children #8
Serial Number: 69

Dimensions: 50" x 36"
Batting: large scrap piece of commercial batting.
Backing: Pieced scrap flannel.  
Quilting: Close machine-quilted grid.

Begun: May 2012
Finished: May 8, 2016

Intended Use/Display: Child's blanket.

Friday, June 10, 2016

Eight Quick Childrens' Quilts, Part IV

"But Michael," I hear you asking. "Didn't you kind of jump from 'Eight Quick Childrens' Quilts, Part III' (in May 2013) to 'Eight Quick Childrens' Quilts, Part V' (this week)? What about Part IV?" Good catch, you!

The reason is, I already kind of did Part IV on my other blog awhile ago. Um, April 2014. How time does fly! Here's what I said there, at the time.


I haven't been doing much quilting.  I don't know if I even identify myself as a quilter anymore.  But I did finish an actual quilt recently.
 

It is made from scrap and recycled fabric, and has lots of jolly frogs and bugs and whatnot.  Its new owner is the new daughter of the one-time Dork of this blog, G.  Here she is, hanging out with a stripy friend:
 
What does she think of her new bedding?  Well, let's be frank, she's probably not doing much critical thinking yet, being still pretty new to the open air.  But who knows, perhaps she will find herself like-minded with Natasha, who is a bit older and 2500 miles away but who also has a Michael5000 quilt.  Natasha's mom recently wrote to say:
Just wanted to let you know that your quilt has been blanket # 1 in Tashi's crib for the last several months.  It is not too clingy, too hot or too cold (not to mention quite beautiful and interesting to look at).  Every night and nap, I say, "Do you want Michael's blanket?"  and Tash says, "Yes, Michael's blanket."  And I pull it over her.  Then if it's colder out I say, "Do you want Ruthie's blanket too?"  And She says, "No, Michael's."
Ain't that adorable?  It's almost enough to make me want to make more quilts.  For Natasha, anyway. 


So yeah, that's what I had to say back in 2014.  But obviously the State of the Craft readership, if there is one, is going to want more details than THAT!

The Specs (G's Daughter's Quilt)

Pompous Title: "8 Small Scrap Quilts for Children #2"
Serial Number: 63 

Dimensions: did not record.
Batting: did not record.
Backing: Pieced scrap flannel, mostly crazy zebra stripes.  
Quilting: Diagonals across individual blocks.

Begun: May 2012
Finished: March 2014 


Intended Use/Display: Child's blanket.
Provenance: Quilt is in adorable use.  I mean, check this out.  It's almost ridiculous.


Right on! Let's get a look at Natasha's quilt, too!


The Specs (Natasha's Quilt)


Pompous Title: "8 Small Scrap Quilts for Children #1"
Serial Number: 62

Dimensions: 45 1/2 x 56 1/2
Batting: Extravagantly pieced scraps of commercial batting.
Backing: Pieced scrap flannel.  
Quilting: A very wavy grid in metallic orange.

Begun: May 2012
Finished: June 2012 


Intended Use/Display: Child's blanket.
Provenance: A few months ago, owner's mom said that Natasha is still into her quilt.

Tuesday, June 07, 2016

Eight Quick Childrens' Quilts, Part V

I suppose you could say more cutting things about a fellow than that he has fallen down on the job of documenting his quilt output.

Right?

Well. I suppose the most pressing question on everybody's mind is "Gosh, Michael, whatever happened to those eight children's quilts you started knocking out four years ago?"

Why, in fact I finished the last of them last month! But this post isn't about this one.  This one is about the third-to-last of them I finished, which I gave away sometime in early 2013.


In case it has slipped your mind, this series was all thrown together from my stock of premade squares, and I used mostly checkerboard patterns.  Obviously we're not talking about particularly adventuresome design concepts, here.  That being said, I really like this one!  The rich maroon and green trim (which was just some salvage bedding) lends some dignity to the proceedings, and though I say it myself the off-kilter diagonal quilting was an inspired choice.

I also like that this one has a subtle theme.  There are four Asian-style dragons scattered through the piece (they are in light blocks, if you want to go looking for them).  That made it appropriate for the Bhutanese-American little girl that the blanket ended up with.  Look up the Bhutanese flag if you don't believe me.

The back was pieced together from a riot of smallish flannel scraps.  Again, of the eight quilts, this one seemed best aimed at the household it ended up in.  Doesn't it look kind of South Asian?  Also, if you look closely at the back, you can notice something that I had completely forgotten about: I interrupted the quilting pattern in order to pick out the four dragon squares.  Again, I have to congratulate the 2012-13 version of Michael5000.  He seems like he was pretty on the ball, to judge from this quilt.

The Specs
 
Pompous Title: 8 Small Scrap Quilts for Children #7, "Four Dragons"  
Serial Number: 68

Dimensions: 54" x 41"
Batting: did not record.
Backing: Pieced scrap flannel.  
Quilting: Conventional machine quilting with scrap thread at 30 degree diagonal.

Begun: May 2012
Finished: June 2012, according to my suspect records

Intended Use/Display: Child's blanket.

Provenance: As of this writing, still in active use as intended.

Sunday, March 24, 2013

Eight Quick Childrens' Quilts, Part III

Last summer, I rattled out faces for a number of children's quilts (the number was "eight," in fact). After an epic excavation of my workspace, I have confirmed that three are still under construction. Four are already in the hands of various adorable children, as described here and here. Make it five.  This one went out to one of my work partner's three year old girl last week.  He claims she likes it.  He claims, and has supported with photographic evidence, that she insists on sleeping on top of it, rather than underneath it.  He claims she wakes up in the middle of the night and talks to the animals in it.  I am unclear whether he sees this as a positive development. The pictures aren't very good -- that's what happens when you don't check image quality before you give 'em away.


The Specs

Pompous Title: 8 Small Scrap Quilts for Children #5, "Green Checkerboard"  
Serial Number: 66

Dimensions: 51" x 46"
Batting: Pieced scrap batting.
Backing: Pieced scrap flannel.  

Quilting: Conventional machine quilting with scrap thread.  The top thread is a metallic, a first for me.

Begun: May 2012
Finished: February 2012

Intended Use/Display: Child's blanket.

Wednesday, July 04, 2012

Eight Quick Childrens' Quilts, Part II

Last month, I wrote about making a short stack of childrens' quilts and giving the first few away.  Last night a third one found its new owner, who quickly got tangled up in it and crashed to the hard floor on the back of his head.  I thought this might lead to mixed feelings about the new blanket, but no, he seemed to like it.  In particular, he liked the frogs.


I originally laid this one out just from squares of plaid and checkerboard fabrics, and still think of it as "the plaid one."  Mrs.5000 pointed out from over my shoulder that it was looking awfully somber for a child's quilt, and that's when the frogs and other critters started making their appearance.  Framing it with some scraps of blue and white stripey fabric I had lying around was a fortunate inspiration.  It's hard to see in this crappy photo, but I'm especially proud of my mitering job at the corners.  The binding is from a scrap piece of, if I'm not mistaken, linen; we'll see how that works out.

Unfortunately, I gave it away not noticing that there were unburied threads, but fortunately the new owner lives nearby and I can make a repair house call.

The Specs

Pompous Title: 8 Small Scrap Quilts for Children #4, "Plaid."
Serial Number: 64

Dimensions: 55" x 47"
Batting: Pieced scrap batting.
Backing: Pieced scrap flannel.
Quilting: Conventional machine quilting with scrap thread.

Begun: May 2012
Finished: June 2012

Intended Use/Display: Child's blanket.


Wednesday, June 13, 2012

Eight Quick Childrens' Quilts, Part I

Like many people who have a "making" hobby, I have a long "to-do" list of projects, some partially finished, some of them fleshed-out design concepts waiting to be brought to life, some of them really just pieces of fabric or found fragments looking for a home, and some just general notions of things I'd like to do.  I bet that, given an hour to paw through my notes and storage compartments, I could come up with more than 100 quilts on my theoretical to-do list.  Most of them will of course never be made.

Every year or so, I decide to draw up a priority list of which quilts I really want to make progress on, like some sort of needle-arts air traffic controller assigning landing slots at the great destination airport of all projects.  This kind of list usually structures my creative activity for four to six weeks before all discipline breaks down and I just work on whatever I'm most engaged in.  But the interesting thing is -- and I think I am completely normal in this respect -- it's not like older concepts progress steadily towards the front of the line, and new ideas take a number at the back of the queue.  Instead, a new idea is more likely to jump immediately into production, and the older projects I've been intending to start for ten years are no closer getting underway than they've ever been.

Anyway, I think what happened six weeks ago is that I was making some symbolic gestures related to the organization of my materials stash, and realized that I had saved up rather a lot of 4", 4 1/2", and 5" squares.  I make squares in those three sizes when I end up with smallish pieces of fabric that I know won't be especially useful to me: juvenile or novelty prints, ugly prints, border fabrics, "cheater" fabrics, reproduction or genuinely old-fashioned fabrics, and so on.  I can make blocks with these, but I can also use them pretty readily to make quilt faces that are just simple grids of squares.

Like so:

Face for "8 Small Scrap Quilts for Children #8."
I brought my boxes of these pre-cut squares downstairs, with no particular agenda in mind, and just started dealing them onto the dining table like I was playing solitaire.  Over the course of three or four evenings, I ended up laying out ten separate quilt faces.  And since then, since these have been pretty simple pieces, easy to work with, I've been able to get six of them completely finished.

Last weekend, we took all six of them over to the home of some young people of our acquaintance -- and by "young people," here, I mean people who still depend on their parents (also friends of ours) to dress and undress them.  I wasn't especially expecting that they would be too too excited about a gift of bedding, but when the little girl was asked if she would like to pick a blanket for herself after dinner, she indicated in the affirmative.  And it turned out that after dinner, before anyone could bring up the subject or come up with some sort of system, she marched over, pointed at one, and said "Can I have this one?"  "Yep!" I said.  "You can!  Here, it's yours!"  Whereupon, her brother came over and said "Can I have one too?"  "You sure can," I said.  "I want the black one," he said.  And so I gave it to him.  And they ran over and spread their quilts on the floor side by side, and started playing a game that involved running in circles on the quilts and shrieking.  I felt that the whole thing had gone off magnificently.


The One the Little Girl Chose


The Specs

Pompous Title: 8 Small Scrap Quilts for Children #4, "Pastel."
Serial Number: 65

Dimensions: 54" x 47"
Batting: Pieced Scrap batting.
Backing: Flannel from a damaged fitted sheet, recovered at the Bins.
Quilting: Conventional machine quilting with scrap thread.

Begun: May 2012
Finished: June 2012

Intended Use/Display: Child's blanket.


The One the Little Boy Chose


The Specs

Pompous Title: 8 Small Scrap Quilts for Children #6, "Stars and Planets."
Serial Number: 67
 
 
Dimensions: 56" x 43"
 
 
Batting: A wonky piece of scrap batting.
Backing: Vertical strips of scrap flannel recovered from the backings of previous quilts.
Quilting: Conventional machine quilting with scrap thread.
 
 
Begun: May 2012
Finished: June 2012
 
 
Intended Use/Display: Child's blanket.

Thursday, May 15, 2008

One Good Reason to Quilt


In the spirit of Jovali's post about Quilts in Their Native Habitat, here is an almost perfect picture from the today's inbox showing our new friend Baby Roy resting on his quilt.

(The quilt is the one I did the walkthrough on earlier this year.)

Wednesday, February 20, 2008

How to Make a Quick Crib Quilt, Part III

Interestingly, I have taken longer to write about making the quick crib quilt than I took actually making the quick crib quilt. This suggests an easy rule you can follow to speed up your quilting exploits: Don't blog about them. But what fun is that?

Also: when I started writing this thing, I thought it would all fit into one longish post. It has turned into three bloated posts. So, although I still maintain that basic quilting is, at its heart, actually pretty easy, there is clearly a little more basic knowledge involved than I had quite realized. Interesting.

Anyway.

We left off last time with the three elements of your quilt -- the front, batting, and back -- all securely fastened together with safety pins. [I should confess to you, incidentally, that it took me a full decade to realize that you want to use safety pins, not straight pins, for this. Not only do they stay in place much better, but they are, as the name implies, safe. They do not rip through your flesh throughout the quilting process. Why did it take me ten years to figure this out? Because I'm an idiot, that's why. But enough about me.]


Step Twelve

Quilt That Sucker (Time: variable)

There are many long books out there about quilting, which is the stitching that holds together your three layers so that you can take those safety pins out. I will restrict myself to a few brief notes here.

In theory, unless you happen to have a long-arm quilting machine lying around the house, you could either machine quilt or hand quilt this thing. Hand quilting is like they do it in the movies, where you use a little hoop and actually put all of those little stitches in by hand, with a needle. Yeah, I know, it sounds nuts, but it is actually a marvelous art form and I have a lot of respect for its practitioners. But it is manifestly not what you would call "quick," so we're not going to use it for this quick piece.

In essence, machine quilting is just running the three layers through your sewing machine for a while to attach them together. Preferably, you want to have the pattern of your quilting be something that will enhance the design you created with your pieceing. In this sample, I quilted along several of the pieceing seams, or "ditches," putting a line of stitches about an eighth of an inch to both sides of them. On the border, I ran three vaguely parallel meandering lines in white thread against the star pattern of the border. This pattern softens the dark fabric a little, breaks up the strict geometry of the piece, and in my mind, has a nice Milky-Way look against the night sky.

General Quilting wisdom:


  • Pick thread that are going to go well with your top and your backing. Top thread goes through the needle, backing thread in the bobbin, and they don't have to be the same unless you want them to be.

  • As with fabric, there is a lot of old, surplus, and extremely cheap thread out there in the world, and frequent readers will not be surprised to learn that I have found uses for such stuff. However, machine quilting is not the place to skimp on thread. This is where the structural strength of your piece comes from, so even for a utility piece like this you will want to use at least a mid-range thread no more than a decade old.

  • The greater the density of your quilting pattern -- the "tighter" your quilting pattern is -- the more durable your piece is likely to be. However, if you get carried away and start putting more than around a line of quilting per inch, your blanket is going to start to get scratchy and stiff.

  • The "looser" your quilting pattern, the more important the quality of your thread becomes.


  • Since you are quilting for speed, have your quilting pattern be either one long continuous line, or lines that go from one edge of the piece to another. Quilting lines that start and stop in the middle of the piece are a pain.

  • For quilting in straight lines, as I did in the pieced portion of this quilt, a walking foot is the schizzle. Best $25 I ever spent on quilting gear.

  • If you are actually using this guide, and are curious about "free motion" quilting, just put it out of your mind for now. Come up with a quilting pattern that uses straight lines, and work at getting all of the quilting stitches nice and even and exactly where you want them to be. We'll worry about free motion some other day, perhaps once I get to be any good at it myself.

  • There are many, many ways to mark the surface of a quilt to get the pattern on it before you sew. They all have their pros and cons, but they all time time. For a little crib quilt like this, though, I recommend just eyeballing it (unless you have a marking method that you want to experiment with, in which case it would be a perfect way to practice!).
Step Thirteen

Attaching the Binding (time: maybe 45 minutes)

There are a million ways of doing this. We'll do mine, naturally.

The binding is the piece of fabric that protects the edges of the quilt. Once again, you need to pick a fabric that, at about a 3/4" thickness, will make the rest of your quilt look good. It should also be a reasonably strong fabric, as it will get a lot of wear, and shouldn't be a fabric that you know bleeds dye, as it may get sucked on. In this case, I chose to use the border fabric for the binding as well, but that is by no means necessary or even the norm.

Cut a strip of your binding fabric at 3" width for each of the four sides of your piece; make them at least 6" longer than the length of each side, and preferably a foot or so longer. Fire that steam iron up to it's highest steam-producing level for maximum effect, and press each strip in half all along its length, bad side together. You end up with 1 1/2" strips of doubled fabric, with the good side visible on both sides.

Pin these strips to the quilt. The two cut edges should be lined up exactly with the raw edge of the pieced top. Center your strips before pinning so that the excess length hangs off evenly from each corner.

Then, sew the strips to the rest of the quilt with the usual 1/4" seam allowance. Start and end each strip 1/4" from the edge of the quilt face. (This will work out so that each strip's first stitch begins where its neighbor's last stitch ended. If you accidentally leave a gap there, it's worth going back and fixing it.


Step Fourteen

Mitering the Corners (time: 5 minutes)

People make a big deal about this, but it's easy peasy. At each corner, fold the face of the quilt together so that the two edges are against each other. Where the excess of the binding strips are hanging off, pin them together.

Starting directly across the strip from where the seams attaching the binding strips end, sew the two strips together. Go halfway across the strip at an angle of 45 degrees away from the quilt.


Then, take a right angle turn, and sew back toward the quilt,


ending up at the point where both binding strips meet at the corner of the quilt.

You should end up with a little arrow pointing down the strips, away from the quilt. I usually then turn around and go over the seam a second time, for strength.


Then, poke the arrow inside out with a seam ripper, et viola!!!


Step Fifteen

Tacking Down the Binding (time: a couple hours)

Get a good, mid-length movie. Some quilters prefer NetFlix or Blockbuster for this, but I generally check them out from the library. I am usually a fan of international movies, but it is important to get a movie in a language that you understand, as you won't be able to catch every subtitle. A dialogue-driven drama is best, since you won't have to focus on the screen so much.

Start the movie. As you watch, pick a spot along the binding, and, using a needle and thread, make a stitch that nips a few threads into the "nose" of the binding, and a few threads on the back of the quilt just inside of the seam that attached the binding strip to the front. Make a knot in the thread, sealing the binding down to the quilt back, and then make a few supporting stitches on either side of the knot.

Now, you are ready to tack in earnest. Insert your needle under the quilt back at the knot, run it about 1/4" within the quilt, along the binding seem. Holding the edge of the binding in place, push the needle back up through the back so that it nips into the binding again. Pull the thread through, then dive the needle back into the backing where it just came out, advance another 1/4", and repeat ad nauseum. When you get to the end of your length of thread, make a little knot like you did at the beginning. You will probably need to go through 3 or 4 threads to get through a crib quilt.

I always thought this was a "whipstitch," but I see I was dead wrong. Whatever. Sorry I'm not doing a better job of explaining it.

Make your stitches shorter than 1/4" inch close to the corners, as they will get a lot of stress there. Make sure there is a stitch right next to the seam at both sides of the miter. Also, this is another place where you don't want to be using cheapo thread.

Instead of movies, some people prefer doing this step while at family events, on flights, or at staff meetings if your office is sufficiently relaxed. Whatever.


Step Sixteen

The Warm Glow of Completion (5 minutes)

It's a lovely feeling, but it is usually quickly replaced by a restless enthusiasm for the next project. Congratulations! You've got the bug!


Thanks for reading this rambling primer. Doubtless all of this has been explained better by others, elsewhere. If you know of any good sites, you might want to post them in the comments for the benefit of any newbs who are trying to follow my rambling directions and getting lost.

Thursday, February 14, 2008

How to Make a Quick Crib Quilt, Part II

OK, let's get back to the crib quilt.

So far, we've got it to the point where the design is finished, but we still have some work to do to get it to the point where it's a serviceable blanket.

Step Eight:

Add a Border. (Time: Maybe 20 minutes)

Borders aren't strictly necessary, and I often don't use them on my serious projects. Oftentimes, though, they frame and highlight your design to good effect. For a utility quilt, there's the added bonus that they add quite a bit of area to your piece with a minimum of effort.

You want to pick a fabric that is going to look good with your design, of course. Darks are usually, although not always, better than lights. Look for pieces that echo some of your design's more common colors; or, if your design is primarily in a single color but with traces of a second color, experiment with a boarder in that second color.

Audition border fabric by just setting it next to your finished design. If you are buying fabric for a border, take your finished design to the shop so you can be sure of getting a good match.

I hit the jackpot on this sample quilt, finding an old piece of discount fabric in my collection that was almost exactly the right size to work for both the border and binding (see below). It is a very dark blue, which works to frame and accent the checkerboard pattern of the main design. Although it makes the piece darker than usual for a baby quilt, the fact that it shows stars in a night sky make it appropriate for a night-night. The stars also echo other stars scattered through the main design, and really set off a crescent moon in the upper right.

I cut the border fabric to strips of uniform width (although you can use different widths for the top/bottom and left/right strips, too). In this case, I made the border strips the same width as the blocks in the main design, to keep a harmonious visual look. I cut two of the strips to the design's height, and sewed them onto the design's left and right. Then, I cut the top and bottom strips to the quilt's new width, and sewed those on as well.

The top is finished!


Step Nine:

Backing (Time: 5 - 30 minutes)

It's possible to have a pieced design on both sides of a quilt, but most commonly you just put a single piece of fabric on the back. I like to use flannel for blanket backs, as it is a very warm and gentle fabric, and feels good against the skin, but regular cottons are fine too.

As with border fabrics, you'll want to pick something that looks fairly reasonable with your quilt top, and if you are spending money, it's a good idea to audition your backing before you buy.

For the current project, I once more go with materials at hand and choose an old fitted flannel sheet that I found somewhere. Its jaunty stripiness is an antidote to the darkness of the border fabric, and the fact that it is a used fabric, although is will likely decrease the lifespan of my finished product, will also make it soft and cozy right out of the box.

Cut the backing so that the quilt top can sit on top of it with at least an inch or two of margin on all four sides.


Step Ten:

Batting (Time: 5 - 20 minutes)

The easiest thing is to run out and buy yourself some crib quilt batting.

Once you've quilted for a while, though, you'll notice that you end up with a lot of long, thin strips of batting scraps left over from your larger projects. To save cash and resources, I'll occasionally assemble these scraps into a piece of batting large enough to work for a crib quilt by simply holding two pieces of batting next to each other and running them through the sewing machine with the needle set on a wide zig-zag. The resulting seam is surprisingly strong, and only really needs to last until you quilt the piece anyway. The only trouble I've ever run into with this was the time I used bright red thread for the zigzag stitch, which was then very visible through the thin, light fabrics on my quilt's face. Oops. Lesson learned: Use white thread for tacking batting.

For this projects, I tacked together two scraps left over when I cut the batting for Labyrinth. Cut your batting to about the same size you cut the quilt back.


Step Eleven:

Laying Out (45 minutes)

What I call "laying out a quilt" is getting the top, batting, and back into position relative to each other, ready to quilt. It's surprising how many different ways there are to do this. I'll just tell you how ~I~ do it.

I lay quilts out on our bedroom floor, which has a nice, tight, low-loft carpet. For bigger pieces, I have to adjust the furniture, but not for a little guy like this one. First, I take the backing piece and spread it out, good side down, on the floor. With some heavy duty pins, I fasten it to the carpet, stretching it just a little bit in t the process so that it is pinned out taut.

Then, I lay the batting on top of the backing, and spend some time smoothing it out so it lies naturally and evenly, with no folds creases. If it is new batting and having a hard time "relaxing," you can hold an iron a few centimeters from it and give it a good blast of steam.

Next, the quilt top goes on top of the pile, good side up. Because you gave the backing and batting a few inches of margin, you should be able to center the top now so there is an inch or more of margin on all four sides. Like you did with the batting, except more so, spend a lot of time smoothing the top out until it sits very evenly on the batting and backing.

Finally, fasten the three layers together with safety pins. What? You don't have safety pins? Maybe I should have mentioned this earlier: you'll need a lot of safety pins. Start in the center and work your way out to the edges, making sure the quilt is keeping its unskewed, rectangular shape.

Warning: the first time you do this, you will probably end up fastening your quilt to your carpet. As you practice, you'll go through a stage where the quilt comes up easily enough, but with an interesting velcro sound as 100 pins pull free of where they were just slightly embedded in the carpet. Eventually, you'll figure out how to put in the safety pins so that your quilt pulls up completely smooth. It's all in the wrist.


Your crib quilt is almost finished! You can even kind of use it at this stage! But you shouldn't.

We'll finish it next time in "How to Make a Quick Crib Quilt, Part III: The Final Chapter"

Tuesday, February 05, 2008

How to Make a Quick Crib Quilt, Part I

Crib quilts are fun to make. It's nice that they are so SMALL -- it makes them easy to handle, and they go fast. Plus, there is no reason to get all fancy about a piece that is going to be repeatedly barfed on and then, later, dragged through mud puddles. You can be more relaxed and experimental with a crib quilt than with something you are making for grown-ups, where you run the risk that people are actually going to be looking at your work for years to come.

If you are an experienced quilter, remember: most parents will be stunned and delighted that you made their child a quilt, but will have no particular sense of its relative quality. And the baby, of course, has no idea what's going on. The crib quilt is therefore an opportunity to showcase, shall we say, your fastest work.

A crib quilt is also a great place to start for a newbie. Are you a newbie? Do you have a sewing machine? Splendid. Let's shred. (If you are an experienced quilter, you can read along if you want to, but really, you already know all of this stuff.)


Step One:
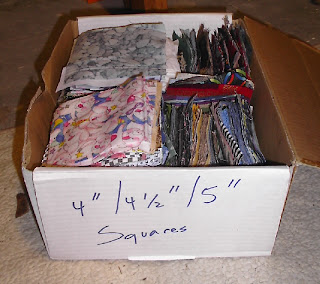
Get a bunch of fabric squares that are all the same size. (Time: Variable)

I cut low-end fabric scraps into 3", 4", 4 1/2", and 5" squares and keep them on hand for exactly this kind of thing. I keep an eye out for juvenile and pictorial scraps at the right scale, and once in a blue moon I'll even buy an eighth of a juvenile fabric just so I'll have some some animals, buildings, vehicles, and other whimsical images on hand for crib quilts and fabric blocks. Kids groove on the images, and they give the quilt some value as a vocabulary-builder when its owner first starts talking.

If you don't have a fabric collection on hand, you'll just have to cut your squares, unless you know me in real life, in which case you can just use some of mine. I've got tons. If you actually go out and BUY fabric for a crib quilt, I encourage you to get the cheapest material you can find. There's no point in shelling out for premium quilting fabric; it's not going to look any fancier than the buck-a-yard sale stuff from JoAnne's after a few dozen barf-and-wash cycles.


Step Two:
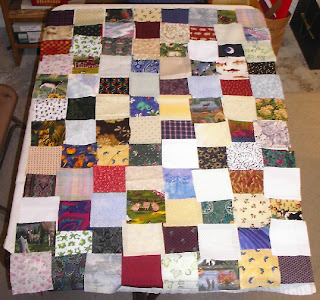

Lay out your squares. (Time: 30 minutes)

This is the fun part. I went for kind of a dark/light checkerboard effect here, but any kind of pattern seems to work fine. I've done crib quilts with jumbled jewel-tone squares and one with no pattern whatsoever, and they ended up fine. Keep moving pieces around until it looks good. It's never a bad idea to go away and do something else for a while, and then come back and see if you still like it.


Step Three:


Keep the squares organized. (Time: 15 minutes)
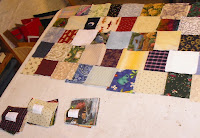

Once you are satisfied with your design, you'll have to have a system to keep your layout intact (unless you are going to sew them together immediately, which would be perfectly acceptable. I'm not the boss of you). Here, I'm keeping each of the eight columns together. I've turned each into a stack, making sure to pay attention to which way is "up" for each piece, and to be consistent about having the top of the quilt be the top of the stack. I pin each stack together, along with a number that is faced right-side up (it's a good idea to underline your 1's, 6's, 8's, and 9's). On stack one, I note that it is the left-hand column.


Step Four:

Sew strips together. (Time: 5 minutes/strip)
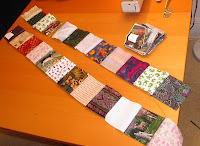
This should go quickly -- it's just attaching each piece to the one above it with a quick, short seam. (For each seam, you put the two "good" sides together and sew a straight stich 1/4" from the edge of the fabric -- the infamous "quarter inch seam allowance.") You'll end up with a bunch of really long, skinny strips of pieces.


Step Five:


Press seams open. (Time: 1 minute/strip)

On the back side of each strip, you need to press each seam open and flat with an iron. But here's where things get controversial. Most quilters will tell you that you then need to "press it back closed," ironing both edges over to one side or another in an alternating pattern from strip to strip. But I don't do that anymore. I press those seams open and leave them open, and find this gets me better results in the long run. I'm definitely in the minority on that score, though.

Some experts say that you should not use a steam iron for quilting. This is because they are silly. Steam not only makes the iron more effective, it also produces a highly satisfying hissing noise and dramatic clouds of vapor, and you wouldn't want to deprive yourself of that.


Step Six:

Pin Strips Together. (Time: Variable)


Now you need to start sewing those strips together. The length of time this takes is going to depend on something that seems a little esoteric at first: how concerned you are with your corners meeting up precisely. This is something that quilters tend to get pretty exercised about. Me, for instance, I don't like my corners to be off by more than two thread widths.

To make that happen, I use special, extra-fine pins to attach the strips together, with at least one pin at every place where seams are going to meet. It takes a while, and is not an especially exciting part of the process. If you are a beginning quilter, you can aim for a lower standard and speed up the process a little. If you decide to "go for a rustic look," or if you just don't give a damn, you wouldn't really have to pin at all. You could just wing it. I've never done that, but it sounds very liberating.

Step Seven:
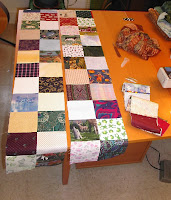
Continue Pieceing. (Time: About as long as Step Six)

Once you have sewn all of your pairs of strips together, you just take out the pins, press the new seam open (and press it back shut, if you want to), and then pin neighboring pairs together to continue assembling the quilt face. The nice thing about this process is that it accelerates as you go. In this example, for instance, we started with eight strips, so I had to pin four pairs together. After that first round, I only had to pin two pairs of pairs. That second round left two chunks of four columns each, so it was just a matter of pinning those two pieces together, and....


Voila! The main area of the quilt face is finished!
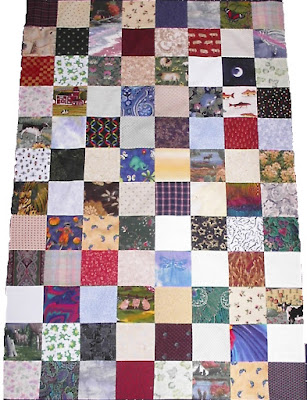


However, it's still very thin, small, and fragile. As it stands, it's not gonna keep a little punk, er, that is, a beautiful precious baby, very warm. We still have some work to do.

So, tune in next time for "How to Make a Quick Crib Quilt, Part II: The Revenge."

Monday, July 23, 2007

Blocks for Babies

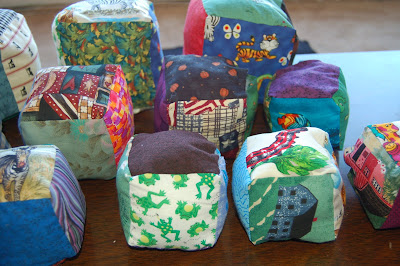
One of the projects I've been trying to get off the table before the new quilting year starts is finishing up a big set of baby blocks I started a few months back. The baby block is my standard baby-shower gift. They are embarassingly simple -- stuffed fabric cubes -- and yet, they are kind of cool.

A bunch of blocks.
I will give you the pattern, if you agree to send me a large sum of money every time you use it. Deal? OK: You cut out six identical squares of fabric. Sew them into a cube, remembering to leave a little hole so you can invert and stuff that sucker. Then, whipstitch the hole shut. Voila.


Baby Ira of Portland, Oregon, digs his blocks.
Infants find them entertaining to grab, and toddlers find them entertaining to throw and eventually to catch. I usually give a few of different sizes, so they can kind of be stacked in a wobbly sort of way. I put "vocabulary items," mostly animals, on two or three faces of each block, so they're good for a little cognitive work too. Parents like them, in that they look cool, they don't make any noise, and it is really hard to break anything with them.


Baby Maya of Jamaica Plains, Massachusetts, enjoys giving her block a good clutch.
Advantages to the maker are: 1) it's a good way to use a little scrap fabric and thread, (2) they cost virtually nothing to make, just a few cents for the fiberfill, and (3) they require very little skill or effort, but you still rock the baby shower by having given something handmade. I make 'em in big batches once a year or so, so I have plenty on hand that I can give to acquaintences at work when they have babies. You give something handmade to someone's kid, they pretty much eat out of your hand after that.

Monday, July 09, 2007

More Baby Quilt Action

No sooner had I finished the quilt for Mr. and Mrs. ChuckDaddy's soon-to-be punk, when another set of friends -- let's call them Mr. and Mrs. Anglo-Lithuania -- are all, like, "oh, we're pregnant too! Due at the same time! Hint, hint!"

Well, what could I do? I made 'em a quilt. Don't tell them, though; I don't think I'm going to give it to them until Thursday. I'm pretty sure they don't read my blogs.

In deciding what to do for this second baby quilt in a row, I wanted to symbolize how cool I thought it was that two of my best couple friends are having babies within a few weeks of each other by having the quilts be somewhat similar. But, I didn't want them to be TOO much the same.

So, this is what Baby ChuckDaddy's quilt looks like:


And this is what Baby Anglo-Lithuania's quilt looks like:


It's got a different color (duh!), no fabric substitutions (I was more careful), and more aggressive quilting (I was more confident). Plus, it makes a nod to tradition with pink in the backing, as the kiddo is expected to be of the female persuasion.


May these and all other babies on the way be fabulously healthy, fabulously happy, and let their parents sleep through the nights. Yeah?

Saturday, June 09, 2007

Anatomy of a Crib Quilt

I do get jazzed about making quilts for babies. They don't have to be very big, very elaborate, or very precise, so you can whup 'em together really fast. They are easy to sew, because you don't have to reef a lot of bulk around on your machine. Plus, they are really high-megaton gifts. If you made a quilt, you are going to OWN the baby shower, making the Made-in-Indonesia set of three pastel color bibs given by that other schmuck look like the shabby gesture it is. Often, giving a baby quilt makes parents cry, which is awesome. They will remember this next time you ask them to loan you money.

(Some of you are thinking about those wussy baby showers to which only women are invited. Apalling sexism, is all I have to say about that. No quilt for you!)

(I don't really think bibs are a bad baby shower gift. But they ain't a handmade quilt, know what I'm sayin'?)

So, among the many recent babies and babies-in-progress in my life is the soon-to-be-baby of Chuckdaddy and Mrs. Chuckdaddy. Since I happened to introduce the parents I feel a certain karmic debt to this creature for arranging for him or her to be yanked from whatever crazy party souls-in-waiting hang out at into this vale of tears. Or whatever. So here you go, ya little punk -- Uncle 5000 made you a crib quilt.

Chuck, if you see this before you see the actual quilt, you should still act surprised.

Formal Aspects

Now, pursuant to the educational mission of this blog, I thought I'd take a look at what is good about this quilt, and also what is not-so-good. Although some of the things that are not-so-good are really JUST FINE in a baby blanket, which is after all something that is made to be barfed on. So I guess I'm really talking about the formal kinds of qualities prized by the quilting establishment, versus the scrappy, casual utilitarian aspects.

  • For instance, one thing that is technically GOOD in this quilt is actually kind of bad in a baby blanket: the color scheme. It's a nice value spectrum of purples, with sky blue, pink, and orange highlights. Reasonably attractive if you like purple, and a nice gender-neutral combination of pink and blue, yeah? But the overall effect is kind of, I don't know, grown-up. Maybe even grandparentish. It certainly doesn't have the bright primary colors that a classic child's blanket maybe ought to have.
  • It is (I think) the first piece I have ever done with squares "on point," or in other words at 45 degrees to the rectangle of the quilt. It makes them diamonds instead of squares. That went pretty well.
  • The quilting looks sharp! I just followed the seams for the most part, but for the two big panels in the center I made a star of four interlocked triangles and a pattern of four interlocked circles.

Scrappy Aspects

  • Since I made it from materials on hand, not everything matches. In the outermost ring, there are three triangles cut from a different fabric when I ran out of the main one. The first ring in of full diamonds are cut about 50/50 from two very different fabrics of the same color, because I didn't have nearly enough of my first choice. Neither of these were design decisions, by the way -- I just screwed up and adapted.
  • The binding on the sides is a different fabric from the binding on the top and bottom. I did do that on purpose. I also whip-stitched the batting together from two scrap pieces. Since I used surplus thread, too, this was essentially a free quilt, made entirely from stuff I had laying around. (The dude with the bib three-pack actually opened his wallet, unlike me, but I'll get to be the hero. Just watch.)
  • Some of the corners don't meet exactly. That will have to be all right.
  • Some of the quilting stitches get a little wobbly -- I don't care, and I don't think Baby ChuckDaddy will either.

Monday, March 19, 2007

Max's Quilt

OK, StateoftheCraft is STILL on hiatus. So just calm down. But I did finish a quick project last month, and wanted to show it off here.


This was another baby blanket, for my young friend Max. It's around 4' by 5', and made completely from scrap, surplus, and recycled materials, right down to the thread. Machine quilting along the edges of the blocks, plus free motion to make the little spirals all around the edges. There are lots of pigs and cows and flowers and other groovy stuff in there that Max knows the words for. And, it's got his name:


OK, I admit I could have done better on the "X". Darker thread maybe.

I took it over to give to Max a few weeks ago. And you know, a sane person doesn't give a blanket to a two year old boy with the expectation that he's going to get all worked up about it. But Max got all worked up about it. I hung around talking to his moms for the next 20 minutes or so, and he played with the quilt the whole time -- running back and forth across it, identifying barnyard animals, rolling up in it, and briefly carrying it around in his mouth (his sisters are dogs). It was about the most gratifying reception I ever expect to get for a quilt.